
Who does not like thick, long and lustrous hair?
Catering to these needs ,there are various versions of all-in-one hair oils for “long, thick, reverse greying, root-strengenthing” with tons of ingredients in them like onion juice, curry leaves, garlic,orange-peel so on and so forth.
Adding everything to the oil has two disadvantages
- Adding too many ingredients to your oil will not address the hair issue specific to one person, thereby not reaching your hair goals.
- The odor of the concoction will not motivate you to apply often.
So, after a lot of experiments , I divided hair oils based on hair goals.Today, I will share the recipe for retaining the softness and pigment of the hair.
If your hair goals include soft, shiny hair and to delay the process of graying, Lets go ahead for the recipe, ways to apply the oil and what to expect!
Note: I added possible FAQs below, but feel free to ask any questions in the comments!
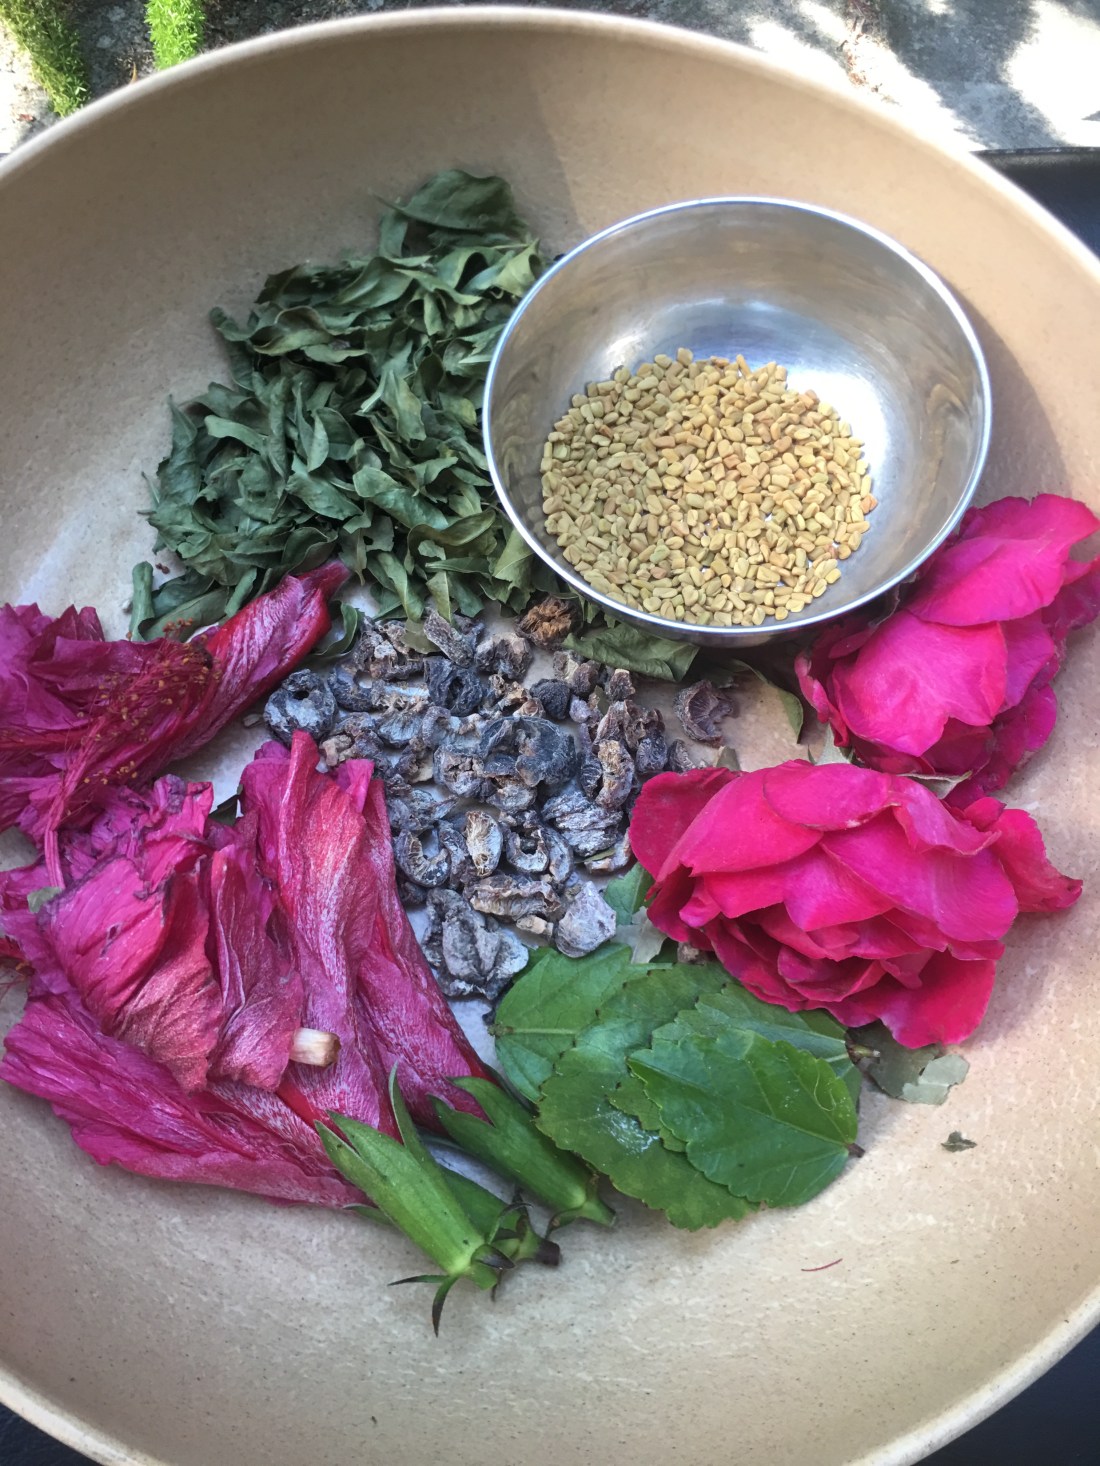
Items needed:
- Hibiscus flowers and leaves – 4 to 5 each
- Rose flowers – 2
- Dried Indian gooseberry/amla – half cup
- dried henna leaves(optional) – 4 Tb Spoons
- Methi seeds – 4 Tb Spoons
Oils:
- Organic Extra-Virgin Coconut oil – 1 cup
- Organic non-toasted Sesame oil – 2 Tb Spoons
- Organic Castor oil – 2 Tb Spoons
- Lavender Essential oil – 2-3 drops each
Procedure
- Remove the petals of the flowers and leaves – wash thoroughly under running water
- Dry them in the sun if it is the early morning time and when the sun is still rising. Any other part of the day, dry them in the shade.
- Heat the oils in a pan. I opted for iron pot but any other pan/pot – mud or stainless steel is good enough. Avoid other kinds of material.
- The heat should always be low . Add amla , methi ,dry henna leaves
- Let them simmer for 1-2 minutes
- Now add the flower petals and leaves
- Oil will start foaming a bit which is perfectly natural
- Once all the ingredients start to change their original color , switch off the stove and let it cool
- Make sure you are not burning anything here. In 5-7 minutes, you can switch off the stove.
- Some people like to heat this until everything turns black.The color changes to black with the low-heat setting in about 10 minutes.However, this is not preference as I would like to leave the oil smelling good.
- Filter the contents and transfer the oil to an air-tight glass container
- Now add the essential oil. This is the optional step but I found that this motivates me to apply the oil more frequently.
- I usually share my recipes with my best friend and she commented that she could drink the oil:D .So that’s the proof!


Important info/possible questions:
Why hibiscus and Rose flowers?
When the hair goals are manageability, strong roots and delay graying – the first plant that comes handy is Hibiscus. This has been used for centuries as conditioner, cleanser, face mask so on and so forth. Rich in Vitamin C and amino acids, Hibiscus penetrates deep into the roots, thus encouraging re-growth and greatly improves texture and volume of the hair.
Rose is rich in Vitamin C and Vitamin E and greatly used to moisturizer the hair, adds shine and prevents breakage.
Can I add dry flowers if I cannot find fresh flowers?
Yes! One of my friends was kind enough to let me pluck fresh flowers from her garden but the second time I made this recipe, I had no fresh flowers available. So, I used the dried ones. Its equally good!
How frequently should I apply the oil?
Well, that depends on your lifestyle or the weather conditions. I live in a very dry climate and I apply once in 3 days and leave it overnight. I wash my hair the next morning. But, for my kid I apply as and when I see that the scalp is dry. Sometimes, I apply the oil to my roots when my hair is still wet after washing my hair.
How to apply?
Believe me, you only need few drops! Dip your fingers in the oil and apply to the roots. Massage in circular motions.Then dip your fingers once again and apply to the ends. Use a brush that has wide seperations and comb well in one direction – root to the end, Make sure that the brush touches your roots when combing the hair.
When can I start seeing the results?
There is no single answer for everyone. Your age, lifestyle and pollution should be taken into account.Moreover, this is not a quickfix. But, I can assure you that you will start seeing the change in you hair texture after few uses.
Where can I buy these?
Online:)
Side-effects?
None that I know of. The ingredients have been used for thousands of years for hair needs.Everything is natural. However, use only “Organic” as much as possible.
Allergies?
I would suggest making a small batch and apply few drops for first use to see how your hair responds.
♥♥♥♥♥♥♥♥♥♥♥♥♥♥♥♥♥♥♥♥♥♥♥♥♥♥♥♥♥♥♥♥♥♥♥♥♥♥♥♥♥♥♥♥♥♥♥♥♥♥♥♥♥♥♥♥♥♥♥♥♥♥♥♥♥♥♥♥♥♥
OK, dear friends! This is it 🙂 Let me know if you liked this recipe.
Chau! See you all with the most-loved, super-easy-to-make and my most popular “Eggless Chocolate cake” in my next post.

Hi Dear, Like the recipe and the way you’ve put it down for us. I’ll surely try this and get back to you with results 😘
LikeLiked by 1 person
Thanks, buddy!
LikeLike
Love your Blog
LikeLiked by 1 person
Thanks,dear!
LikeLike